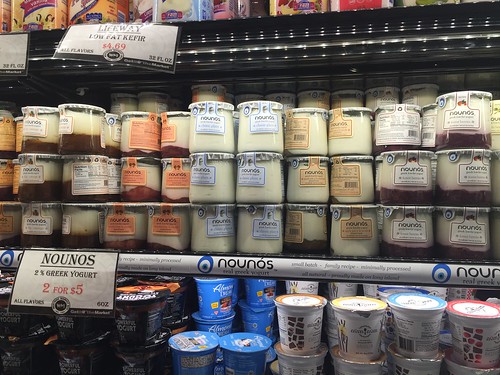
Today, instead of doing an Aerogarden post, I’m doing a giveaway….for YoPlus yogurt AND the sports bag in the picture above! MyBlogSpark sent me the the care package above (it includes a big gym bag, a sports towel, ear buds and two free coupons for any flavor of the new YoPlus Light yogurt!) YoPlus yogurt is for people on the go – perfectly portioned, a variety of flavors, and packed with probiotics to help regulate your digestive system. They have all these awesome flavors like key lime pie, honey vanilla, and strawberry banana, but my grocery store only sells strawberry and vanilla (and a four pack cost $5!) I mixed a little ground flax seed with the yogurt because I thought it was way too sweet, but it’s not a bad afternoon snack to get you through the day.
You can have up to THREE ways to win the awesome giveaway!
1. Leave a comment here and tell me your favorite afternoon snack
2. Follow me on Twitter! (leave a separate message telling me this)
3. Retweet / reblog this contest! (leave a separate message telling me this)
The contest will end on Monday, November 30th, at 5PM – I’ll randomly pick a winner from the comments section!
Winner:

Congrats, Esther!


After our very quick cheeseburger at Fresh-N-Fast Burger, I headed up to midtown west for some pork buns at Xie Xie. Xie Xie means thank you in Chinese, so I was interested to check out their take on sandwiches, especially their lobster roll. Also, I love the Hell’s kitchen area because of the abundance of cool restaurants and I finally made it over to Xie Xie to try their pork buns (and sadly, no lobster rolls because they were sold out):

The interior design is really cute – colored fortune cookies cover their back wall:

And they have a lot of different types of drinks (alcoholic and non-alcoholic):

I went with the sweet glazed pork on a Chinese bun:

The order comes with three buns, which is perfect for one person (or two if you’d just finished burgers and fries). A closeup of the bun:

The pulled pork was way too sweet; it tasted like it was dredged through a pile of sugar before it was placed in the bun. The cilantro and shallots evened out the flavor a bit, but the meat was still too sweet to finish.
I also shared a pear cider:

The pear cider was expensive ($10) and tasted more like sparkling pear juice than a hard cider. Even with a low alcohol content, I would’ve expected less sugar. Xie Xie was definitely not a bad second dinner by any means, but they ran out of their lobster rolls (by 7:30pm on a Friday night) and the fall back dish that we ordered was too sweet. I’d return for their thousand year egg dessert or their lobster roll, but I’d definitely pass on the sweet glazed pork buns and pear cider.


On Friday night, I noticed people were eating at Fresh-N-Fast Burgers, so I figured I’d stop by to grab a cheeseburger and fries before dinner. The restaurant has been getting a lot of attention recently because the design and menu is similar to In-N-Out. See exhibit A:

The colors and logo are kind of similar to In-N-Out, but the red, yellow, and white color scheme is also used in other fast food restaurants (ex: McDonald’s). Lou and I were pretty excited to try their burgers because we haven’t had a good burger in a while so we walked in and I started taking pictures while Lou went to order our cheeseburger. Their menu is also similar to In-N-Out. See exhibit B:

While I was snapping away, a woman approached me and told me that the restaurant wasn’t actually open yet (they were doing a test run for friends and family) but Lou had already ordered so it was too late to turn back. We ordered a cheeseburger and fries to share (I wanted to go to Xie Xie for dinner so this was an appetizer). Our meal:

Their burger patties are fresh (they don’t even own a fridge…just like In-N-Out), they cut their fries in the back of the restaurant (just like In-N-Out), and they have a special sauce that they put on all of their burgers (JUST LIKE IN-N-OUT). However, their burgers aren’t like In-N-Out taste-wise; they’re decent, but very greasy (I could barely take these photographs because my camera kept slipping out of my hands). The cheese on their cheeseburgers also wasn’t melted completely – it was slightly melted in the middle, but greasy around the edges. Their secret sauce was also squirted on the lettuce, not the bun, which annoyed me because the lettuce was way larger than the bun. The fries are VERY greasy and taste more soggy and oily than fresh and light and are definitely not worth ordering (they remind me of Five Guys’ fries). They’re still working out their kinks and I can see it being a good alternative to Shake Shack if you don’t want to wait in line in the wintertime.
Cheesecake is a great dessert anytime of year and adding pumpkin to the dessert makes it a creamy and delicious dessert for Thanksgiving. The recipe is very simple and it’s a quick and easy dessert that’s definitely a crowd pleaser.
Pumpkin Swirl Cheesecake Recipe
Ingredients
adapted from cooks.com
2 cups Ginger snap cookies, crushed
Handful of pecans/walnuts, or any other kind of nut
1/4 c. butter, melted
2 (8 oz.) pkgs. Cream cheese, softened
3/4 c. sugar
1 tsp. vanilla
3 eggs
1 c. canned pumpkin
3/4 tsp. cinnamon
1/4 tsp. ground nutmeg

Combine crumbs, pecans, and butter:

Press onto bottom and sides of 9 inch springform pan:

Bake for 10 minutes in a preheated 350 degree oven. After 10 minutes, remove from oven and set aside.
For the cheesecake filling, Combine cream cheese, 1/2 cup sugar and vanilla:

Mix at medium speed on electric mixer until well blended:

Add eggs, one at a time, mixing well after each addition:

Separate 1 cup cream mixture:

Add pumpkin, remaining sugar and spices to remaining cream cheese mixture:

Mix well:

Pour the pumpkin mixture into the springform pan:

Spoon the cream cheese into the pumpkin cream cheese mixture:

Use a knife or spoon to swirl the cream cheeses together:

Place in a 350 degree oven with a bowl of water underneath (to prevent the cheesecake from cracking). Bake for 45 minutes at 350. The finished cheesecake:

Cost Breakdown:
2 cups Ginger snap cookies, crushed – $1.99 (I used the entire bag of Trader Joe’s gluten-free ginger snaps)
Handful of pecans/walnuts, or any other kind of nut – $0.50
1/4 c. butter, melted – $0.75
2 (8 oz.) pkgs. Cream cheese, softened – $4.00
3/4 c. sugar – $0.50
1 tsp. vanilla – free
3 eggs – $0.30
1 c. canned pumpkin – $0.50
3/4 tsp. cinnamon – $0.25
1/4 tsp. ground nutmeg – $0.25
Total: $9.04
Macaroni and cheese wasn’t on my original Thanksgiving menu until Friday night, when my friend told me that it was always part of his Southern-style Thanksgiving dinners. I didn’t want to exclude any side dish and it was too late to ask someone else to make it, so after work on Friday night, I walked myself to Chelsea Market, picked up pasta, then walked all the way to Trader Joe’s to pick up the cheeses, sour cream, and bacon. Yes, I walked all over the city to buy ingredients for Thanksgiving dinner, but it was worth it because this was the best macaroni and cheese I’ve EVER had…seriously! If I were to make the recipe again (for people that didn’t mind spicier mac and cheese), I’d split up the cheese; instead of 1 pound of sharp cheddar, it’s do half a pound of sharp cheddar and half a pound of Monterey Jack. The recipe is very easy for a weeknight dinner and oh-so-delicious!
Macaroni and Cheese with Bacon
Ingredients (I doubled the original recipe, so you can easily half it):
16 ounces elbow macaroni (I used cavatappi, which is double elbowed macaroni)
4 cups small curd cottage cheese (2 16-ounce containers is the perfect amount)
2 cups sour cream
16 ounces sharp cheddar cheese
1 handful of Trader Joe’s Quattro Formaggio (a blend of asiago, provolone, and Parmesan)
2 Beaten eggs
16 ounces asiago
12 ounces Niman Ranch Bacon (completely optional, but seriously delicious)

First, shred the sharp cheddar and set it aside:

For macaroni and cheese that you’re going to bake, I recommend buying blocks of cheese and shredding it yourself (I mean, it only takes a couple extra minutes and the cheese is usually a lot better!)
Cut up the bacon strips and fry them up, making sure you don’t overcrisp them:

After the bacon is cooked, pat it dry on a paper towel and set aside. Now that the bacon is done and the cheese is shredded, boil some water to start cooking your pasta. While you’re waiting for your pasta water to boil, you can start making the cheese sauce.
To make the cheese, place the 2 16-ounce containers of cottage cheese in a large bowl:

Then add your 2 cups of sour cream:

And then your sharp cheddar and handful of Trader Joe’s cheese:

Mix all of cheeses and eggs together to make this tasty combination:

Add your bacon:

Now that the cheese mix is done, you can watch your cavatelli cook:

When the cavatelli is finished cooking, drain and shock it with running cold water to stop the cooking (if you don’t, the cavatelli will be mushy by the time it finishes baking in the oven. Some people prefer a mushier cavatelli, but I like all pasta to be al dente).
Add the cavatelli to the cheese mix:

Gently mix and be careful not to break all of the cavatelli elbows!:

Pour the macaroni, cheese, and bacon into an oven-safe buttered casserole dish and place into a preheated 350 degree oven for 40 minutes. I wasn’t going to serve the dish immediately (I prepared it on Friday night) but had a bite when it came out of the oven…the macaroni was oozing with cheese and the slightly crisped bacon was out of this world! I let the dish sit at room temperature until I was ready to serve it – on Saturday, I shredded 16 ounces of asiago while the macaroni was in the oven heating up (350 for about 10 minutes), removed it from the oven, placed the shredded asiago on top, placed it back into the oven, and turned the oven to the low broiler (so the asiago would form a nice crust). I don’t have any pictures of the finished mac and cheese because people started digging into it right away, but I found this picture:

The macaroni and cheese recipe is probably the closest recipe to DuMont Burger’s that I’ve ever had – soooo good and I didn’t even have to take the train to Brooklyn to eat it!
Cost Breakdown:
16 ounces elbow macaroni (I used cavatappi, which is double elbowed macaroni) – $1.95
4 cups small curd cottage cheese (2 16-ounce containers is the perfect amount) – $5.80
2 cups sour cream – $2.00
16 ounces sharp cheddar cheese – $3.19
1 handful of Trader Joe’s Quattro Formaggio (a blend of asiago, provolone, and Parmesan) – $0.75
2 Beaten eggs – $0.20
16 ounces asiago – $3.19
12 ounces Niman Ranch Bacon (completely optional, but seriously delicious) – $4.59
Total: $21.67 Definitely the most expensive side dish I made, but the cheeses and bacon added up very quickly. The mac and cheese was enough to feed 14 hungry people (and I also had leftovers for the next day)


