By
grace.g.yang
· December 1, 2008
Under:
Dinner,
My Life,
Travels This year, we didn’t have turkey in North Carolina (my mom made two chickens instead). We hosted two parties (one that lasted until 5AM!) and had an amazing array of Chinese dishes, including lion’s heads (that’s a literal translation from Chinese to English – they’re Chinese meatballs served with cabbage and noodles), sticky rice, stuffed Japanese eggplant, mung bean noodles (it might sound a little weird, but it was actually my favorite from both nights) and other great dishes (I’ll post close up pictures later):

I spent the rest of my Thanksgiving break lounging around in my pajamas, rock climbing, spending time with my family, and making upgrades to gracenotesnyc.com.


David and I landed in North Carolina on Saturday afternoon and the first thing on my mind was Cook Out. Cook Out has the absolute best pulled pork sandwich I’ve ever had (trust me, I’ve had quite a few) and the “restaurant” is conveniently located close to my house, so every time I come home, I have to go at least twice. In terms of fast food restaurants, it’s probably one of my favorite places to go, next to In-N-Out. Cook Out isn’t really a restaurant – it just has 2 drive-thru windows and a walk-up window:
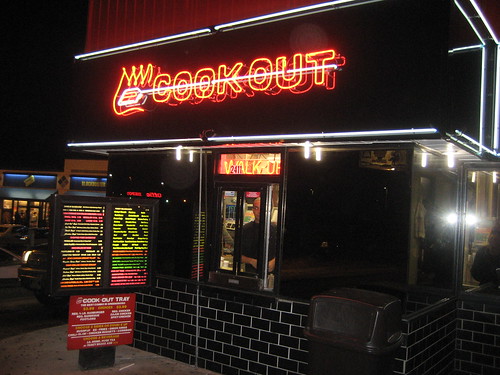
The prices are also ridiculous – I mean, you get a full plate AND a drink for about $5. They also have Cheerwine, which is something I’ve only found in the South, but is a cherry flavored soda that’s pretty tasty. A full plate is a pulled pork sandwich and TWO sides – the sides aren’t great, but the pulled pork sandwich is so amazing that you don’t even remember to eat your sides. I usually order a pulled pork sandwich with fries and a corndog or chicken nuggets:
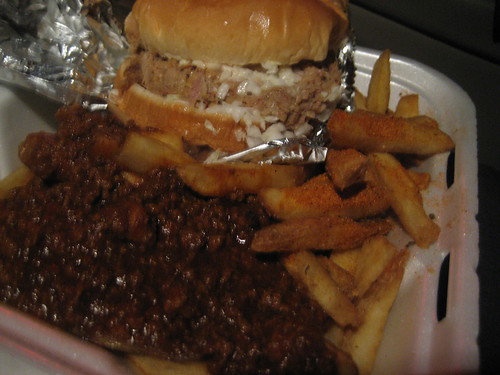
Cook Out features North Carolina style barbeque, which I think is the best, and the pulled pork sandwich is topped with an amazing coleslaw; the coleslaw is a basic cabbage and light mayonnaise mixture that really adds a wonderful touch to the sandwich. It is seriously the best sandwich EVER.
They also have great flame-grilled burgers:

Last time Chris came to visit, we went to Cook Out because I told him how amazing it was and after he tasted the pulled pork sandwich, we ended up going two more times before we flew back to New York. Cook Out is really an amazing little shack, especially because they make 36 different kinds of milkshakes (they have their own wikipedia entry). My favorite shake is the banana pineapple mixture (next to the strawberry banana shake):
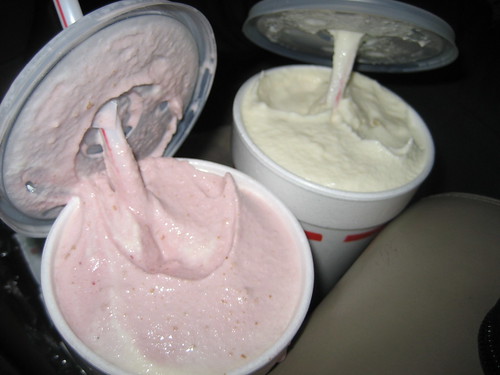
They use fresh bananas and canned pineapples (which I’m usually not a fan of) but the ice cream semi-freezes the pineapple chunks, which makes the shake unbelievably good. They also have seasonal flavors, like watermelon in August and egg nog in December. The fruit flavors are better than the candy mixes because the candy chunks are still kind of large and you end up eating the shake with a spoon instead of drinking it with a straw, but all of the shakes are pretty amazing.
Cook Out is also open really late, so if you’re ever craving a milkshake or a pulled pork sandwich around midnight, you don’t have to go to bed hungry!
By
grace.g.yang
· November 20, 2008
Under:
Dinner,
My Life,
Recipes I actually got the idea to brine the Thanksgiving turkey from Alton Brown – I was up late at night watching the Food Network and Alton came on explaining why brining a turkey is better because you don’t open and close the oven constantly AND the overnight brining makes a big difference in flavor. I think my mom usually brushes the turkey with its own juices, but she’s been preparing turkeys for a while and knows what she’s doing and this was my first turkey so I wanted to experiment a little.
ANYWAY, as I was walking through Williams-Sonoma, I saw a recipe packet for Thanksgiving ideas. One of the first recipes was for a buttermilk brined turkey, which sparked my interest. Buttermilk? The picture looked really delicious, so I decided to give it a try. The main ingredient was a brining package that you buy from Williams-Sonoma (which I passed on because it was mostly salt, peppercorns, star anise, sage, rosemary, and other things that you could put together yourself). The FIRST thing I had to do was BUY a turkey:

Trader Joe’s had the best deals on turkeys – they were $1.79/pound (compared to $4.99 at Whole Foods) and they were all around 15 pounds, which was perfect for our party because you’re supposed to prepare about a pound – pound and a half for each guest. All of the turkeys were pre-brined (in a salt water solution), so I took that into consideration when I put together the buttermilk brine (I barely used any salt when I put together my brine).
Ingredients for brine (for a 15 pound turkey):
4 quarts of buttermilk
Whole peppercorns (a handful is enough)
Sage
Lemon wedges
Rosemary
Thyme
A little salt (if the turkey is already brined)
I bought a large brining bag ($4.99 at Bed, Bath, and Beyond), stuck my turkey in it (after I removed the gizzard and the heart, liver, etc) and then started pouring in the buttermilk and other ingredients. If you have a turkey that hasn’t been brined and you end up putting salt in the mix, melt the salt in water before you add it to the turkey. Here’s what the turkey looked like pre-brine:
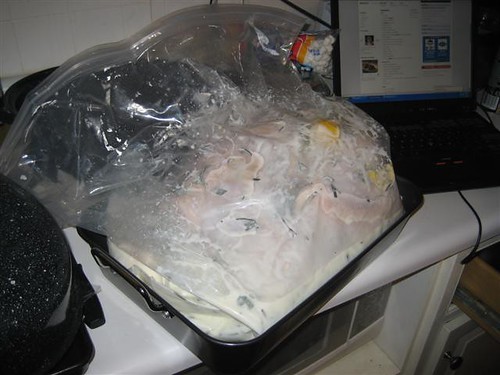
The brine didn’t cover the entire turkey, so halfway through the night, I turned the turkey over so it would be evenly brined. In the morning, I washed off the brine, patted dry the turkey (inside and out), and put together an herb butter (butter mixed with thyme, sage, and rosemary) underneath the turkey breast skin so there would be a little more flavor during cooking. I covered the turkey with aluminum foil and stuck it in the oven at 350 degrees for about 4 hours (occasionally, I would open the oven door, and brush the turkey with a mixture of maple syrup and butter to get a really crispy crust). Here’s the final product:
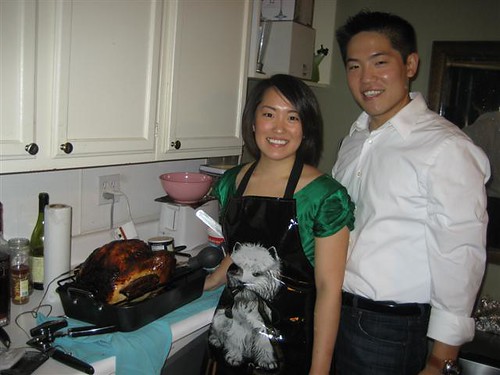
To make sure your turkey is done, don’t rely on the thing that pops up on the turkey breast! I used a thermometer and made sure the temperature by the upper thigh (not touching any bone) was at 160 (although the USDA says it should get up to 165). The turkey ended up being really juicy and tender and was cooked really well, so I think it was pretty successful! I wish I could’ve made one turkey without brining it so I could’ve tasted the difference, but I barely have one oven so the buttermilk brine was good enough for me (and my guests)!
By
grace.g.yang
· November 20, 2008
Under:
Dinner,
My Life,
Recipes Thanksgiving is probably my favorite holiday of the year because we always have a big party in North Carolina. One of my favorite sides happens to be stuffing – not the stuff you make from a box like Stove Top, but the kind where you can taste big chunks of freshly made cornbread. I decided to make cornbread this year and let it sit out for a week so it would be really hard (to absorb all of the flavors and still have some texture). Here’s the recipe for the stuffing after you make the cornbread:
Ingredients:
1 tablespoon canola oil
1 medium onion, finely diced
3 stalks celery, finely diced
1 carrot, finely diced (for color)
1/3 cup diced liver (chicken or turkey)
6 cups coarsely crumbled cornbread
2 tablespoons chopped fresh sage (or 1 teaspoon dried)
3 cups hot reduced-sodium chicken broth
Coarse salt and ground pepper
2 tablespoons butter, plus more for dish
Preheat oven to 350 degrees. Heat oil in a 12-inch skillet over medium heat. Add onion and celery; cook, stirring occasionally, until onion is translucent, 6 to 8 minutes. Add liver; cook, stirring, until beginning to brown, about 4 minutes. In a large bowl, combine onion mixture, cornbread, and sage. Pour broth over mixture; stir just until combined. Season with salt and pepper. Transfer to a buttered 1 1/2-quart shallow baking dish. Dot with butter. Bake until golden brown on top and crisp around edges, 40 to 45 minutes.
Here’s a picture of me mixing together all of the ingredients:
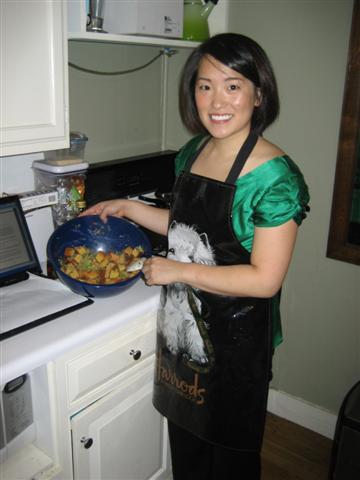
The cornbread stuffing turned out really well and I think everyone enjoyed the new take on a traditional side dish.
Next up: preparing a turkey!
By
grace.g.yang
· November 19, 2008
Under:
Dinner,
My Life,
Recipes Every year at Thanksgiving, my mom prepares a TON of good food (15 dishes, at least) but green bean casserole is definitely not on that list. Sauteed green beans with garlic might make an appearance once in a while, but green bean casserole is a little too…traditional…for us. I spoke with my friend, Blake, about preparing a Thanksgiving dinner and he insisted that green bean casserole HAD to be on the table. I didn’t want to disappoint, so I found a recipe for green bean casserole and made it. The recipe was adapted from Cooks Illustrated and really easy to follow – it was a real crowd pleaser (except Joe, who thought it wasn’t seasoned enough).
Ingredients:
Beans
1 lb green beans, cut into bite sized pieces
Mushrooms and Sauce
8 ounces baby portabella mushrooms (I had a mixture of white mushrooms, large portabella mushrooms, and baby portabella, so the recipe is definitely flexible)
1 tablespoon unsalted butter
1 tablespoon fresh garlic, minced
Kosher salt to taste
Fresh pepper to taste
1 tablespoon flour
3/4 cup chicken stock
1 tablespoon dry sherry (I didn’t use any)
3/4 cup heavy cream
Salt & pepper to taste
Topping
1 tablespoon unsalted butter
1/2 can of French fried onions
Breadcrumbs
First, boil a pot of water and dump in all of the green beans into boiling water. Cook the beans for about 4 minutes and then drain the beans and plunge the beans into ice water (to stop the cooking). Make sure you dry the green beans and put them aside. Chris was responsible for drying the beans while I made the mushroom sauce and took his responsibility really seriously. The beans were REALLY dry!
Second, put the butter, garlic, and mushrooms into a pot and let the mushrooms cook through (about 5 minutes):
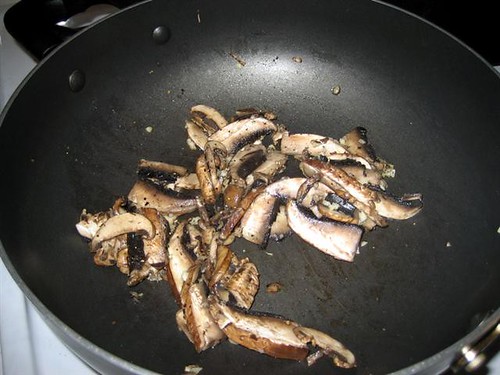
Add the flour to the mushrooms:

Add chicken broth and cream to the mushrooms and bring to a simmer:
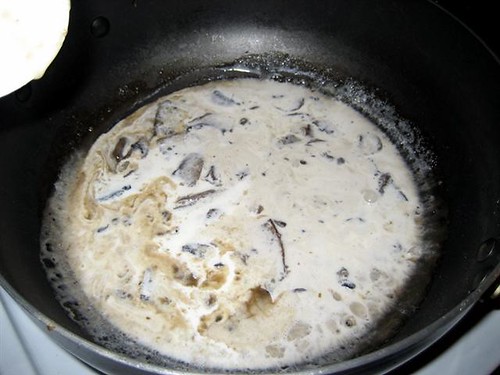
Simmer the sauce until it thickens, about 5 minutes – it should look like this:
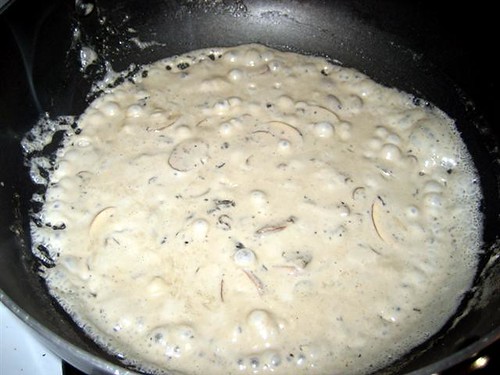
After the sauce has thickened, add the green beans (that have been thoroughly dried):

I refrigerated the casserole until Saturday and then brought it out to room temperature while I finished making the topping. For the topping, I just mixed the breadcrumbs and butter together (you can do it in a food processor, but I just used my fingers) and then mixed it with the French onion topping. Sprinkle the topping over the casserole and bake for about 30 minutes (or until it bubbles). I don’t have any final pictures, but it looked really pretty!
Next up: cornbread stuffing!
